Thursday, November 19, 2015

Total Re-org and CMRM Part 1

Howdy readers – today’s long post details a lot of work done in the Train Room over the past few days, and Part 1 of my visit to the CMRM.

I devoted nearly 12 hours to the Train Room this week, and while most of the changes will be invisible to guests, it was an extremely fruitful week! I’ll start with the layout…

I set up the CTA 4-car “L” set on Track 3. From reading the manual, I decided to try out a fun feature that allows me to program the train to stop automatically at a set of stations that I decide. To program the train, I use the “whistle/horn” and “bell” buttons on the transformer. However, the Lionel ZW transformer I’ve been using to power the set since March 2014 is about 70 years old and doesn’t have these buttons. A ZW transformer has a whistle lever, but this doesn’t work that well for programming purposes. To get around this, Lionel manufactured separate buttons that can be wired between the transformer and the track to provide whistle/horn and bell functionality to any transformer. I had been using these separate buttons, but there are a few drawbacks. One, a ZW controls four trains, meaning I would need 8 buttons (4 trains x 2 buttons each) to get full sound capabilities on each track. Two, these buttons are about $20 each, and I have 3, so it would be kind of expensive to get an entire set for a ZW transformer. Three, I use some rather beefy 10 or 12 gauge wire to power the layout, but these buttons use tiny 18 gauge wire, so when the buttons are used, the power flow is decreased significantly. Four, since bringing the remainder of the collection back from Illinois, I now have my full complement of transformers available to me, some of which have built-in whistle/horn and bell functionality.

So, I decided to make a big change in the layout power supply configuration. I swapped out the 250W Lionel ZW transformer with two 270W MRC transformers. This improves things significantly, and solves the whole whistle/horn and bell button issue. It also means that 2 tracks get to share 270W instead of 4 tracks sharing 250W, so train performance will improve overall. The MRC transformers are controlled by wired remotes. These remotes provide some handy added functionality as well – they have a “brake” button that smoothly slows down the train, and a “stop” button to be used in case of a problem that immediately kills power to both tracks. While I prefer operating a ZW to a wired remote, I am so far pleased with the results.

Anyway, back to the “L” cars… After hooking up the MRC transformers, I began programming the CTA set to stop at specific spots on the track and announce specific stations in an order of my choosing. I followed the manual, and after several attempts I got the train programmed. Even with buttons for the horn and bell functions, it is difficult to get the timing just right. When the train is running, I can send it a command to enter “auto mode”, and it will run and stop indefinitely without any prompting from me. It’s a neat feature for an “L” train!

I set up The Canadian on Track 4, which consists of 3 F3 locomotives and 6 streamlined passenger cars. For more details on this train, please see my December 5, 2013 blog post. This is the first time I’ve run this set in Montana, and it looks really sharp. And now I can operate the horn and bell a lot more effectively with the MRC transformer.

I ran all four trains and found that the extra-long CNW Trainmaster will bump trains on Track 3 when it is rolling on Track 2. So, I’ll just run 3 trains at a time, which is fine and slightly less noisy. Also, I discovered that CP Coach 111 has a low magnet on one of its couplers that occasionally strikes a track joint on the west side of Track 4, which needs some fixing. Later in the week, I opened up CP Coach 111 to check for problems with the truck. While I didn’t see any problems, I was pleasantly surprised by the car’s construction. I’ve never had need to open one of MTH’s passenger cars, but they are well built, especially compared to earlier car designs from other manufacturers. I ran the car with the low magnet at the rear and didn’t have any problems after 10 loops.

In preparation for the Christmas season, I set up the O-scale nativity set that my wife gave me. It looks pretty good with some rocks in the background. It is a neat feature that helps us remember what Christmas is all about!

Also in “above layout” news, I’ve hung up two more artifacts: a PRR can and an MRL crossing post license. I’ve also had some correspondence with the MTH Service Dept regarding the NP 0-6-0 sound problem. I also gave the room a good dusting. Last night I vacuumed the floor and some surfaces.

Now for “under layout” news… I spent a lot of Saturday sorting and organizing all of the non-train tubs. Meaning, the scenery, figures, vehicles, track, transformers, accessories, buildings, electronics, non-O-gauge trains, and a plethora of other items were removed and then replaced into new homes for storage. I found a few things I had been missing, and threw out some un-needed boxes and miscellany. Another big project was the completion of my “every train needs a box” initiative, which started and ended on Saturday. I have four specially designed padded corrugated boxes made for storing/transporting O gauge trains. These boxes now contain all of my trains that don’t have their original box anymore, and each box has a category: Post War Engines, Post War Freight, Modern Engines, and Modern Rolling Stock. After sorting everything, I reorganized the under-table area and the locomotive closet. The under-table area is now in a “U”-shaped storage formation, with the tubs/boxes that I access most often in front and on top. The tubs at the bottom of the locomotive closet contain items that I most likely will not need to access until the layout of the future is being built.

To help keep track of which “train box” contains which train, I’ve added a Location column to my inventory spreadsheet, so I can quickly see where a train is located in the train room. For example, if the field shows “TB1”, then I know that it is located in “Train Box 1”.


And now, back to Colorado...

On the second Saturday of our trip, my wife attended a shopping event in Loveland, CO, and I headed to Greeley. The Colorado Model Railroad Museum is located there in a 15,000 sqft steel building. I had a delightful visit! The museum contains a very large HO layout, a Thomas-themed O gauge layout, a wooden trainset for little kids, a real caboose, a Lionel collection, a large collection of railroadania, and a gift shop. I was there for about 3 hours, but easily could have spent the entire day. There were folks of all ages there to visit, and there were over a dozen staff members or volunteers onsite as well. I took a lot of pictures and video, and got some good ideas for layout details, as well as building construction ideas. I also purchased a Lionel Yule Marble flat car to commemorate the trip, and serve as a birthday present to myself in a few months J

The full-size caboose is a restored Colorado & Southern (CB&Q) rear-cupola wooden model. It sits on rails and ties inside the building. The interior is open for inspection, and is fully outfitted with authentic, period details (including the linens on the bed).

The O gauge layout, although rather small, is very impressive. It is basically a maze of interconnected track loops, and is covered with modern and historic operating accessories. There are 6 trains on the track, which consist of a Thomas-style locomotive and a caboose. There are buttons all around the perimeter of the layout which activate the multitude of accessories, and control the whistle sounds on the locomotives as well. The most impressive part of the layout is the control system, which is housed in a large set of processors on the wall. The system insures that the trains do not run into each other using a rather complicated set of blocking. The trains also run very fast, so they look sort of like a swarm of bees zipping in every direction when in motion.

The Lionel collection consists of about 200 Post War pieces in a glass display case. They also have some Post War transformers, accessories, and advertising on display.

The railroadania collection is spread throughout the entire facility, and consists of nearly 1,000 artifacts ranging from full-size semaphores to vintage time schedules. If time allowed, I would have spent more time studying these items. Highlights include a collection of 40 Pullman seat cloths from various railroads, over 100 time schedules from various railroads in a custom-built wooden rack, which visitors can read, railroad signage and uniforms, one of the most complete railroad lantern collections I’ve ever seen, 100’s of railroad switch keys in a glass case, and a pair of seats from a MRR Olympian Hiawatha passenger car. Wow!

The gift shop had mostly touristy items. However, there were a few custom model railroad cars for sale (including the Yule Marble car I purchased), and several DVD’s produced in house about layout construction and scenery. These looked pretty interesting!


But, the unopposed star of the museum is the massive HO layout, which I will talk about next week in the Thanksgiving post! Until then, have a jolly time, and keep all of your rails shiny ~

The November-December Roster: MKT NW2 Grain Train, CNW Trainmaster Fast Reefer Freight, CTA 6200-series “L” cars, CP F3 ABA The Canadian

The Canadian

CNW reefer freight

The CTA 6200-series set

PRR can

Under-layout view

Train box for PW Freight cars

The model railroad nativity set

Lionel display at the CMRM

Passenger car towel display at the CMRM

Railroad time tables display at the CMRM

Part of the railroad lantern collection at the CMRM


O gauge layout at the CMRM, notice the control system on the wall

C&S caboose inside the CMRM

Thursday, November 12, 2015

MPC Diesels and Front Range Curves

Welcome back to rail-land ~
This was a fruitful week in the Train Room. I also did some more planning for future expansion. And, I’ve detailed some more of my train adventures from our trip to Denver last month.

In the Train Room, I used the voltmeter to measure the ohm resistance in the speaker on the NP 0-6-0. The measurement showed approximately 16 ohms, which is exactly what a healthy speaker should show. According to MTH’s ProtoSounds 2.0 troubleshooting guide, either the chip needs to be reprogrammed, or the board needs to be replaced! Bleh! I emailed the MTH Customer Service team to see if they could provide any other insight.

To begin prepping for the Christmas season, I’ve put away the current projects, and will take them out again next year. So, the NP 0-6-0 and Electroliner were reassembled and stored safely in their boxes, and the rest of the roster was stored as well (The Bozeman Zephyr, CSS Interurbans, the NP freight train, and the UP Postwar train). While storing the Postwar searchlight car, the light housing fell and cracked. Thankfully, this was already a replacement housing, and more replacements are readily available. I’ve added this to the Engine House spreadsheet. As I put these trains away, I also inventoried them in the spreadsheet.

On Sunday, I got out all of the trains for the Nov/Dec roster. I also did some general straightening of the room, and changed all of the calendars to November. On Monday, I set up Track 1 with the MKT NW2 leading 4 CNW ore (grain) cars and an MKT caboose. The MKT engine is the first diesel locomotive we had on our train set when I was a kid. My father bought it at the Brass Whistle train store in Rockford, IL. For many years, this was the "ol' reliable" engine for moving freight. I also moved the portable fireplace, and in its place stacked 3 tubs of trains. On Tuesday I did some rearranging under the train table, to place frequently accessed tubs on top of infrequently accessed ones. I also set up Track 2 with the CNW Trainmaster pulling 5 reefers (MRR, GN, CNW, Dairy Men’s, NP) and a CNW caboose. I also lubricated the MKT NW2 and CNW Trainmaster. Both of these diesels were manufactured by “Lionel” during the 1970-1986 “MPC” era. MPC (Model Products Corporation) was a subsidiary of General Mills, and owned the Lionel rights during this time. These engines are 35-40 years old, and after some lubricating, they are running very well! As I set up these trains, I also inventoried them in the spreadsheet.

I also had fun planning out some options for the train building of the future. After dealing with a lot of boxing and unboxing trains recently, I’d like to one day have all of the trains on display or running on the layout. This means that I have to plan for sufficient wall/shelving space in the new building, so I did some preliminary calculating and wall-layout planning.

So, back to my Denver train-doings… On the Thursday of our trip, after dropping my bride off at training for the day, I drove north of Golden on Highway 93, and turned left towards the mountains on Highway 72. After two miles, I turned into a residential area on Blue Mountain Drive. This road took me to the top of a foothill, and I had views facing east towards Denver. I parked along the side of the road, and walked over to the edge of the hill. I was able to tracks below me, which traveled through a variety of curves. I arrived just in time to photograph and film a BNSF EB mixed freight coming down the mountains and entering the curves. Like the BNSF trains that travel through Billings, this one had engines on the front end and a few more at the back. It took it about 10 minutes to navigate the wandering track path, and I was able to view it the whole time. A few moments after the BNSF cleared, a waiting UP WB mixed freight powered up and began climbing the hill. The UP was headed by 5 locomotives, and had 1 helper locomotive located in the middle of the train. I watched the train wrap around itself as it continued up the hill. While watching the trains, a local resident came by as she was walking her dogs. She didn’t seem too surprised to see a railfan here, and she provided some interesting information about the curve the trains were traveling through below. Along the eastern side of the curve, on the west side of the track, a string of hopper cars were buried in the ground and filled with dirt. Trees were planted behind them. The trees and buried cars create a type of snow/wind fence, as this curve is in the direct path of any inclement weather coming off the mountains. The buried cars are somewhat visible from Highway 72. After the UP train went out of sight, I drove down the mountain road and met the train at the crossing. It continued through another curve around Coal Creek Peak while I headed back east. After another hour or two of climbing and curving, the train would arrive at the Moffat Tunnel and traverse the Continental Divide.

Meanwhile, I went back to Golden and drove through the Coors Brewery/Manufacturing plant. I drove through the entire facility and saw many interesting rail operations and equipment used at the beer-producing plant. Coors has their own fleet of locomotives, and a lot of freight cars get shuffled about all day long. There are also semi-frequent BNSF trains making deliveries to the plant. After returning to Lakewood, I visited Jenny’s Junk Emporium, which is a consignment shop that specializes in railroad and model railroad items. They had a lot of railroad artifacts and media, and trains of all scales, including quite a few G-Scale items. The prices were rather restrictive, so I just enjoyed looking. So, this was another fun morning of train-related activities! Next week I’ll conclude with a review of my visit to the Colorado Model Railroad Museum.

My Train goals for the coming week are: setup/inventory/lubricate trains on Tracks 3 & 4, finish reorganizing the tubs under the table, repack the “Train Boxes”, and make sure ALL of the tubs are labeled.

Until then, enjoy some more photos, and keep those rails shiny ~

BNSF train headed down the hill through the S curve

UP train headed up the hill towards the curves

UP train approaching the buried hopper cars

The mid-train helper engine

The UP WB train continues past Coal Creek Peak

Coors locomotive C997 awaiting orders

Another Coors engine parked in a siding

An intricate layout of tracks supporting the Coors plant

Testing the NP 0-6-0 speaker with a voltmeter

The MKT NW2 and the CNW Trainmaster pull their consists around Tracks 1 and 2

The first diesel train I ever operated (back in the 1980's)

Thursday, November 5, 2015

Light Rail, Caboose Hobbies, and More...

Welcome to November y'all. Here you'll find details about my over-the-rails trip to a hobby shop in Denver, and you'll see what railroad-related adventures I've been having in Billings over the last week.

Continuing on from last week's post...
While staying in Lakewood, CO last month, my wife attended some training classes for work, which freed me up to pursue my own interests (trains) during the day. On the Wednesday of our trip, I dropped my wife off at her class, and proceeded back to our hotel on Union Blvd in Lakewood. I prepped a small backpack for the journey, and walked a few blocks east to the Regional Transportation District (RTD) Federal Center Station. This station allows for transfers between buses and light rail trains. Denver uses overhead catenary wires to power its commuter trains. It was another beautiful day, and I've shared several pictures of the journey at the end of this post. I started by riding the W line east to the Auraria West station. The W line is relatively new, and they are continuing to expand the line west into Golden. The track, bridges, crossings, and stations are all clean and safe and beautifully decorated. Each station along the W line seems to have a different "theme", and local artists were hired for each station to beautify them. The styles varied widely, but one commonality across the whole line was that each signal box had a mural painted on it. For those that aren't familiar with "signal boxes", these are typically located at road crossings or, as the name implies, near signals. They are usually silver in color, and vary in size, but for the most part they have a human-sized door on them, and look like a small, metal hut. On the W line, you won't find silver signal boxes - rather, you'll see very colorful murals, each with a different theme.

After a 30 minute ride, I arrived at the Auraria West station close to downtown Denver. This is a transfer station with access to all of the other lines. This station was clean, but was much more active than the stations on the W line, and it didn't have any art. But, it did have a nice view of Denver landmarks, like the football stadium, the university, the amusement park, and the skyline. For my next destination, either a C or E line train would work, so I took the first available, which was an E line train. After a 10 minute ride, I departed at the Alameda Station. This station is located behind a shopping center. I walked a few blocks east to the Caboose Hobbies store on Broadway street.

Caboose Hobbies is one of the largest train stores in the country, and is most likely the closest large store to Billings. They sell trains of all scales, and also have expansive sections of railroad media, model railroad scenery, and railroad miscellany for sale. I enjoyed seeing new and used trains up close, although they were all priced outside of my budget. Based on our conversation with Alan the previous day, I looked for specific items among the G-scale train section. I had planned to purchase some scale-sized people for my train set, and that is exactly what I did. They have a plethora of people for sale in all scales, and I took my time choosing 6 that would fit in with my 1950's era layout. I think the section of the store that impressed me the most was the scenery area. They have a few scenic'd model railroads on display, and a good selection of Thomas & Friends toys. They also have a large staff of folks to assist, and to top it off, they were having a special sale that I was able to take advantage of. It is a lot of fun to visit a big train store! Impressively, I was in and out in under an hour, and was back on my way to the Alameda Station before lunch.

The Alameda Station is located at the southern end of a large Union Pacific rail yard. South of the station is a very wide curve to the west, and since the end of the yard was devoid of parked trains, I had a great view of approaching and departing trains traversing the curve. I hopped on a C line train headed north, and snapped some photos of the downtown area and UP yard en route to Auraria West. While waiting at the next station, I saw several other trains pass through, dropping off and picking up passengers. Most of the people at this station were university students, headed to various parts of the city. I only saw two people taking advantage of the city's currently lax drug stance. An interesting train that came through was a short, two-car train labeled "Training Train" and was listed as out of service. An experienced conductor was riding with a trainee on their route. After a bit, a west bound W line train came along, and I began my trip back west. I viewed the opposite side of the tracks this time, and photographed some of the interesting art pieces along the way. I de-trained at Federal Center Station and grabbed some lunch on the way back to the hotel. It was a very fun experience and was more than appropriate for a trip to a train store! Check back next week for more tales of railfanning adventures along the Front Range of the Rockies ~

Now for some more local train news! Last Saturday (Halloween), I affixed my DIY cross buck to our backyard shed. It looks pretty neat, along with the existing Whistle sign post. On Sunday, I spied an EB CSX train in the Laurel yard, far from home. It was hauling several coal hoppers, and a variety of mixed freight. It had two engines at the head (the second had been painted recently), and no helper units. Occasionally I'll see CSX locomotives mixed with local liveries (BNSF or MRL), but I haven't seen a solely-CSX train around here, so it was worth noting. During the week, I made some more improvements to my train spreadsheet: based on Alan's advice, I sketched a revised garden railroad track plan, I improved the Abbreviations list, and I created topographic and signal maps for the O Scale layout of the future. Yesterday I (finally) finished repairs to the CBQ E8 A. A few weeks back I thought I had resolved the problem of a wire rubbing against the rear vertical motor while running. However, when I went to pick up the locomotive a few days ago, I discovered that I had neglected to re-fasten the shell to the frame and ended up relapsing the original problem! Yesterday, I caused further problems by accidentally breaking a soldered joint in the shell. So, I transported the engine to my work bench (the washing machine with an old t-shirt draped over it), and re-soldered the broken link. I then used electrical tape to affix the misbehaving wires to the shell. After a few tests on the track, I deemed the problem was finally solved, and I screwed the shell back to the frame. Last night I hung up a framed picture of the New York Central's 20th Century Limited passenger train in our stairwell. Amber had purchased this picture for me at an auction last spring, and now it has a nice spot on the wall. Finally, I finished up the night studying how to use a voltmeter to properly test the speaker on the NP 0-6-0. MTH provides a list of troubleshooting steps for Protosounds 2.0 locomotive issues. In this case, the steamer runs properly, and the lighting and smoke systems function. There are no sounds whatsoever. The first steps are basic - make sure the power is on; make sure the tender is connected to the loco; make sure the volume is turned up... The next step was to "reset" the locomotive to factory defaults. All modern locomotives with sound systems have a method for programming different features. This method differs based on the transformer you are using to operate the locomotive. To reset a Protosounds 2.0 locomotive with a Postwar ZW transformer and separate whistle and bell buttons, the method is this: 1) place the locomotive on the track and supply about 10V of power to it, 2) press the whistle button once, and then press the bell button five times, holding each button for about 1 second. This process is supposed to reset the engine. I have performed this a few times with the 0-6-0, and it hasn't resolved the problem. The next step is to measure the ohms resistance on the internal speaker inside the tender. MTH provides the exact measurements that it should be outputting, but I have never measured an ohm before, so I used wikihow to find out how. I hope to give this a shot over the next week and see what I can find!

Enough talk - how about some pics! Take care, and keep your rails shiny ~

The Federal Center Station. There is currently an EB W Line train in the station. In the foreground is some art, and you can see some of the signal boxes painted with murals as well. In the background you can see the Denver skyline and smog.

The Auraria West Station, with a good view of the catenary wires and their supporting structures. Notice how clean the station is!

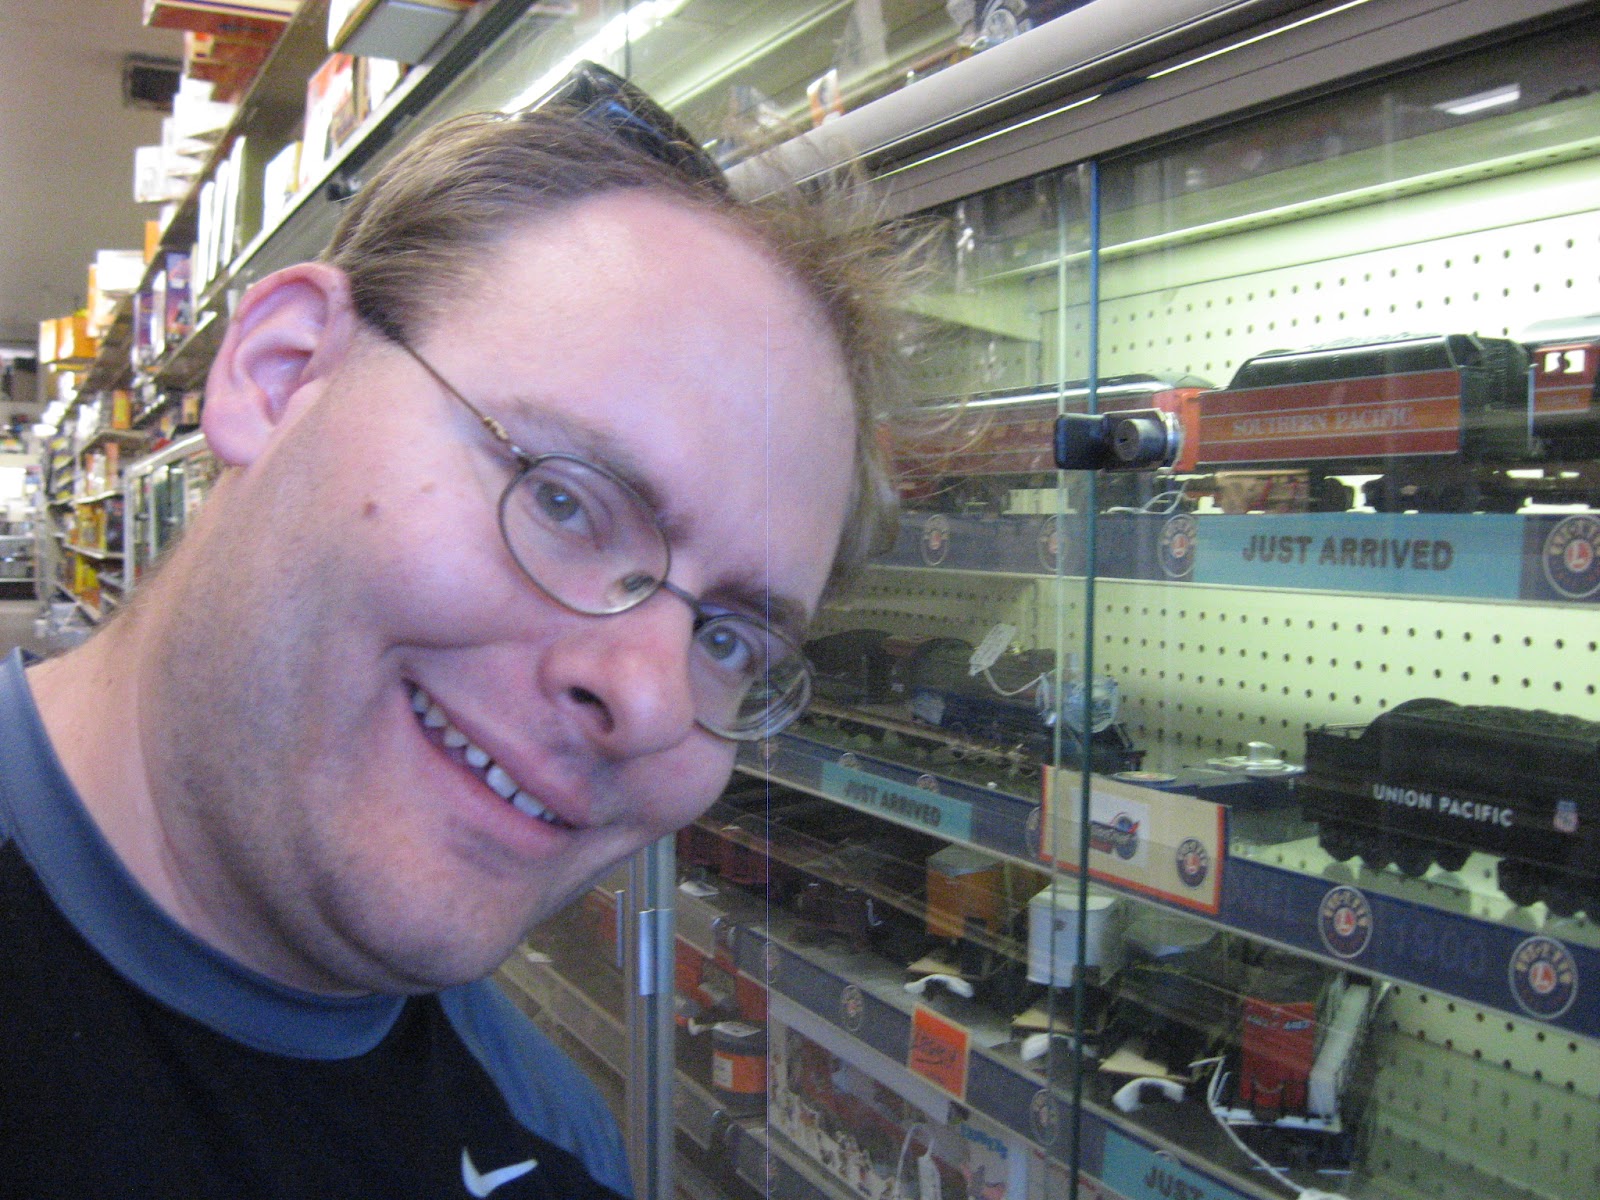
Here I am in one of the O Gauge aisles at Caboose Hobbies

The 6 new citizens I purchased for the train layout

Two RTD trains meet along the curve south of the Alameda Station

A few of about 100 UP locomotives parked in the yard

A string of 6 UP engines await clearance to enter the yard, with the Mile High Stadium and the Rocky Mountains in the background

Here's the nifty Training Train at the Auraria West Station

Boats taking a hike at the Oak Station in Lakewood

The DIY cross buck on the shed, with the Whistle sign in the foreground

The 20th Century Limited can now be viewed in our stairwell

Thursday, October 29, 2015

Roundhouse, CRM, and Cross Bucks

Welcome to the end of October, readers! As I advised earlier, I'll be providing some railroad-related details from our trip to Denver ~

After having lunch in Cheyenne we stopped by the historic Union Pacific Depot. Well, actually we went to the not-so-historic parking lot of the Depot. Amber checked on my surgery recovery progress, and I was able to stand and look at the Union Pacific roundhouse. There were no parked trains obstructing the view, so we were there at an opportune time. The roundhouse is only open to visitors once a year during Depot Days in May of each year. But, as a ferroequinologist, it was fun just to be on site. For those of you that don't know the significance of this, the UP roundhouse in Cheyenne is home to the railroad's operational historic locomotives. Here, the engines receive restoration, maintenance, and protection from the elements. The steam locomotives that reside here are Northern #844, Challenger #3985 and newcomer Big Boy #4014. There are also vintage diesel locomotives and passenger cars that get stored/serviced here. While crossing over the train yard bridge, I spotted an E or F unit still bearing the CNW livery. I hope to visit the inside of the roundhouse during Depot Days someday!

On a Tuesday afternoon, we visited the Colorado Railroad Museum in Golden. Staff were busy decorating the campus for the Polar Express events, which will take place over the next few months. Our reason for visiting, however, was the garden railroad display. We spent an hour with Alan Olson, the chairman of the Denver Garden Railroad Society, who graciously provided information, ideas, and answers about starting a garden railroad from scratch. We discussed track, plants, grades, buildings, rolling stock, electronics, weather, wildlife, track plans and more. We will continue to use Alan as a resource as we get closer to construction of the garden railroad in our backyard in Billings. Some useful ideas from Alan included: a kidney-bean shaped track plan with scenery obstructions to provide interest, battery-powered locomotives, the use of thyme as ground-cover, using drip-irrigation, running trains in the snow, tracks at waist height, and track structure that can support a human's weight. We stayed with Alan until the museum closed, and picked up a copy of Garden Railways Magazine on the way out.

Back in Billings, I was able to paint the lettering on my Do-It-Yourself cross bucks for display in the backyard!


Until next week, keep those rails shiny!

Myself and the Cheyenne roundhouse

View of Cheyenne's historic depot

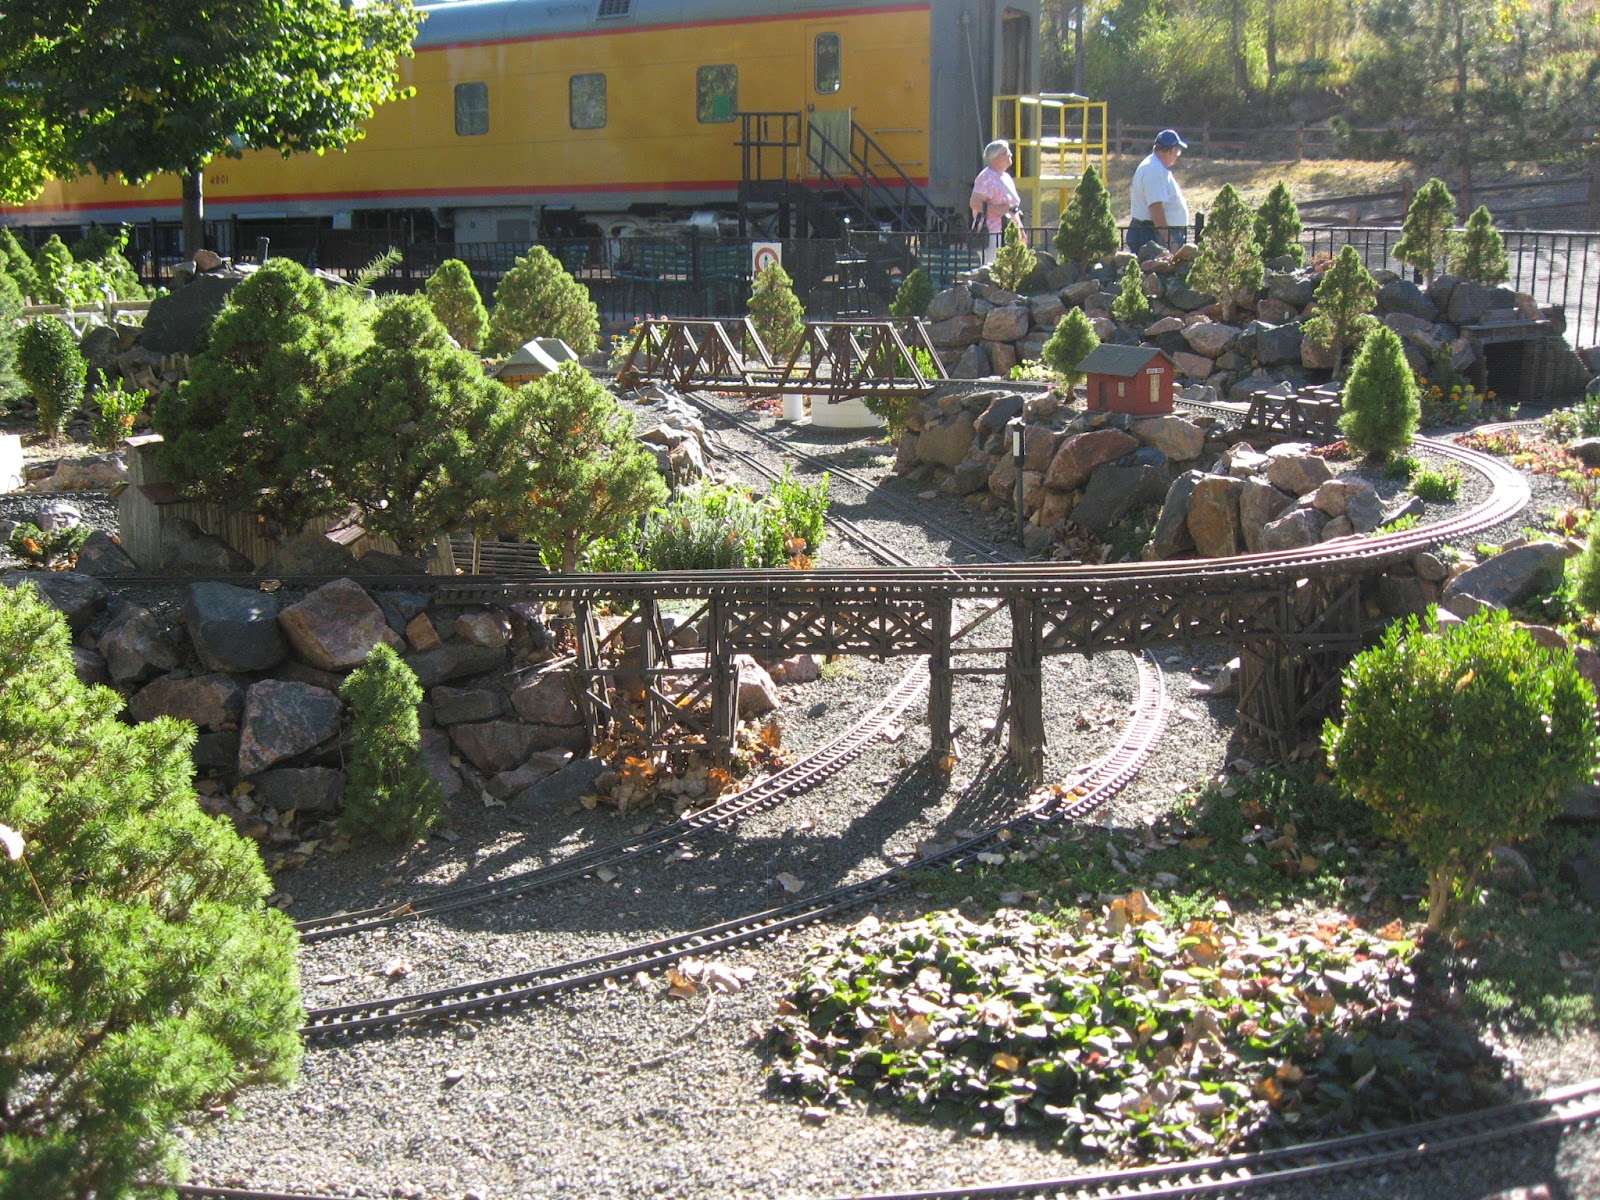
Bridges and water feature on the CRM garden railroad

Elevated section of the garden railroad

Photo showcasing track, structures, rocks, plants, and seating along the garden railroad

Multilevel features on the garden railroad

Alan draws some sample track plans while I look on

Time for Christmas! Usually visitors see the words "Colorado Railroad Museum - Delay Junction" on this building.

This dead tree is a great spot for giant Christmas ornaments at the museum

DIY cross bucks in process

Thursday, October 22, 2015

Rails in Excel

Hello Readers ~ sorry for missing a post last week, I was out on vacation!

My wife and I visited the Denver area for a week, and I have a lot of fun train adventures to share with you. Today I’ll provide an overview, and over the next few weeks I’ll get into some details. We visited the Union Pacific Depot and Roundhouse in Cheyenne on October 10th. On the 13th, we visited with Alan Olson at the Colorado Railroad Museum and discussed garden railroading. On the 14th, I took the Denver Light Rail train downtown to do some shopping at Caboose Hobbies. On October 15th, I camped out on a foothill near Golden to do some trainspotting, and also viewed the rail operations at the Coors Brewery. I also went to a store in Lakewood that specializes in consigned railroad and model railroad items. And, on October 17th, I spent several hours at the Colorado Model Railroad Museum in Greeley.

Since returning, I’ve done a bit of “digital organizing” – I have a spreadsheet that I use to keep track of train projects and plans, and it needed some work to make it more useful. The spreadsheet contains the following tabs of information:
·         Map1: Two maps of the proposed 32’x20’ O Scale layout. The first shows track and building locations, and is divided into 29 sections. Each section refers to a specific area of the layout for easy reference, like “Silver Falls-Downtown” or “Silver Falls-Yard”. The second shows color-coded tracks and streets, town/place names, and geographic features like lakes, rivers, and forests. It also shows where each major railroad on the layout is based. For example, the town of Cedar Valley is primarily served by the Great Northern, while the town of Red Stone is served by the Rock Island and Santa Fe, with occasional service from the Frisco and Katy. There is also a key showing 108 proposed buildings/structures. Both maps use close-to-scale measurements for track and structures. I plan to add a topographical map as well.
·         Silver Falls Upper: A map showing detail of downtown Silver Falls, which will be elevated. The 23 proposed buildings are shown with close-to-scale measurements. This detail information would not have shown up well on the larger maps on the previous tab.
·         Area Attrib: A list of any detail or idea to include in the layout of the future. There are 365 items so far, and this is a good spot to list ideas. Example 1: For the church in Silver Falls, look at American Model Builders kit #152-491, which is a 7x4x6” brick building and currently costs about $32. Paint it cream with brown trim. Example 2: Remember to install tell-tales in front of all bridges and tunnels throughout the layout.
·         Wish Locos&Sets: A list of locomotives and passenger sets I’d like to eventually own. Some of the items on the list haven’t been produced yet. For example, I’d like to buy the Santa Fe “Midnight Chief” F3 ABA diesel set from K-Line to go with my existing passenger set. The model number is K-25303, and currently sells for about $445 on eBay or Trainz. A goal date to purchase this set is in 2019. This sheet also contains a cross reference of scale sizes and how an actual inch compares to model feet in each scale.
·         Wish Rolling Stock: Similar to the previous tab, this is a list of freight cars or individual passenger cars I’d like to add to the fleet. It also includes a list of 185 applicable Atlas O Reefers for reference.
·         Engine House: This is a new tab I added this week to track repair work. It shows the current status, report date, begin date, fix date, item details, and problem description for each issue that occurs on the train set. Going forward, I will use this to track all the work that is performed. For example, on 10/21/2015, I reported that the Denver Rocket passenger set has very squeaky wheels, and is in need of something to quiet it down.
·         ILLINOIS: contains a list of items we brought back from Illinois this year. This is mostly for reference, and once the master inventory is complete, this tab can be removed.
·         Train Names: A list of every motive unit and its current status. It also shows when the unit was last run on the train set. A separate list on this tab shows every train by name or purpose and the last time it was run. I also use these lists to schedule the next roster line up, so I end up with a good rotation through the locomotives and trains. For example, the Great Northern 2-8-2 mike was last run in April, 2015 and is in operational status. Or, the Broadway Limited last ran in May, 2014, and was pulled by the Pennsy GG1.
·         Train Log: A list of train-related activities done each day. For example, on 5/18/2014, I successfully tested the lighting on the Granite Canyon Pullman car, but encountered other issues (see previous blog for details on that one!)
·         Inventory: This will contain the master inventory of all train-related items in my collection. It will show a Record Update Date, What the item is (a model train, an artifact, or an “other”), the Manufacturer, Type of Item, Sub Type of Item, Description, Scale, Roadname, Road Number, Item Number, Year Manufactured, Condition, if the Box is present, the Box Condition, personally assessed Value, and Notes.
·         Abbreviations: This is another tab I added this week. If someone who isn’t me uses this spreadsheet, this tab will provide a key to the various railroad (or other) abbreviations I use. For railroads, it also lists sample color schemes used. For example, “GN” refers to Great Northern, and the color schemes used on the layout (circa 1955) are orange/dark green/yellow. Or, “EB” refers to East Bound.
·         Summary: This sheet is here to remind me how each railroad is represented on each layout. It is a basic summary of the future O-Scale, O27-Scale, and G-Scale layouts. It includes equipment that hasn’t been purchased yet. For example, “ATSF is a through-line, with one F3 diesel set and a matching passenger set.”
·         Details: I use this sheet to list prototypical pairings of locomotives and passenger sets. It shows which town hosts each locomotive and train, and in some cases, lists the proposed date of purchase in the future.
·         Garden: This includes very early sketches of a garden railroad plan, with measurements provided based on track loop diameter.
·         Garden Details: This is similar to the Area Attrib sheet, but shows G-Scale details instead. For example, “include a cabin on a mountain”.

So, stay tuned for details on my railroad adventures in Denver over the next few weeks, and also regular updates on model train activities here in Billings. Until then, enjoy these pics, and keep those rails shiny ~


UP roundhouse in Cheyenne, home to Big Boy 4014

The DGRS railroad at CRM

Southbound RTD light rail train in Denver

The famous Caboose Hobbies

A UP freight works its way up the S curve

Lots of tracks throughout the Coors facility

A little peek of the phenomenal HO layout at CMRM

A big collection of Pullman towels at CMRM

Thursday, October 8, 2015

Livingston Model Trains

Hello there,

This week I didn't have the opportunity to do a lot of train-related activities. But, I did open up the Burlington E8 motive unit and moved the wire the was rubbing against the rotating motor component. I tested it for several minutes, and the rubbing sound appears to have gone away!

So, since I don't have much additional news on my own railroading endeavors, here is a quick write up and view of the Livingston Model Railroad Club in Livingston, MT.

We visited a train swap meet at the restored Livingston Northern Pacific depot in April, 2012. The depot itself is worth checking out if you're in town - it is a marvelous structure and the town has done a great job maintaining it. Next to the depot is the original NP baggage building, and the local model railroad club houses their layouts there. They have an expansive, winding HO layout, and a nice, long O layout too. The O gauge layout was made by a modeler who has since passed away, but in this location, hundreds of people have been able to see his handiwork. The operating layout is very well scenic'd, and hosts local-to-Montana trains, both modern and historic. The pics below are from our 2012 visit, and you can learn more about the Livingston Model Railroad Club here: http://www.livingstonmuseums.org/depot/Modelers.html.

Modern MRL power on the Livingston layout

Great scenery and details! Here, a little red "beep" brings a train across a bridge

Unit trains and great weathering on this busy little layout

I watch happily as a steamer drifts by

Thursday, October 1, 2015

Paper Railroadania

This week I was recovering from some surgery, so I had to do mostly tame activities. I was able to place a lot of my paper railroad memorabilia into protective sleeves for storage and eventual inclusion in binders.

Lots of railroad paperwork collected over the years