Thursday, January 16, 2014

Lumber Quest


Hello - hey we've made it halfway through January! Last week I completed staining all sides of the shelf pieces. Over the weekend I headed to the lumber store with the Gamsby's cargo van, and acquired wood for train and various other house projects. The lumber associate was kind enough to cut all of my 4x8 boards to the desired sizes while I loaded up 49 2x4s, 5 2x2s, and an assortment of screws and mounting brackets. It took a while to load them, as 1 out of 3 boards didn't meet my quality standards. The 2x2s were all bowed horribly, so I went with the best of what was available (fortunately these will be used in rather short sections.) I was treated to a nice workout, as I had to load or unload all of these items 3 times. Everything (myself included) made it home safely. Thank you to the Gamsbys for the use of the van, and to the Rockford Poynters for the Home Depot gift card! Over the next few days, I got all of the shelves mounted on the walls. Each shelf had different challenges and blessings to deal with, and I found (as expected) that the studs behind the walls are not in standard positions. So the mounts are not evenly spaced, and a lot of them are using dry wall anchors for added stability. I started displaying a few of my railroad artifacts on the shelves, and everything has held together so far! This week's Train Room guest included Michelle, whose real reason for visiting was to hang out with my wife and work on a jigsaw puzzle, but she liked the new shelves nonetheless.

Lumber purchase

Shelves on the east wall

Entryway and western wall shelves
 Now for the tenth discussion about future passenger trains: The Empire Builder. The Empire Builder was the flagship of the Great Northern Railroad, and began service between Chicago and Seattle in 1929. It was named after James Hill, who created the Great Northern Railroad from several smaller railroads, thus building himself an "empire." The Great Northern ran the train until 1971, when Amtrak took over. The train still runs today, traversing the "Hi Line" of Montana, including the southern edge of Glacier National Park. Unlike most of the other passenger trains I have discussed, this is one we've actually ridden on. I've taken the Empire Builder from Malta, MT to Columbus, WI (and other points East) on three occasions thus far. The seats are very spacious compared to airplane travel, and it is fun to walk about the train while the scenery zooms by. The train is very smooth running over most of the line, although there is some older track that is a bit rocky. The passenger cars are bi-level, and we've always had a seat upstairs. Downstairs is some additional seating, and a spot for all of the non-checked baggage. You can bring some big bags on-board for no extra charge. Also downstairs are the restrooms and lots of fun lights and buttons on various panels. At night I like to hang out near the doors, which are sometimes open and you can smell and feel the night air zipping by, to the tune of the train's ever-repeating clickity clacks. It is very therapeutic - at least for me! When not in our seats, we like to spend time in the vista dome lounge car, which has a snack bar downstairs. It's a fun spot to play cards! And dining on the train can't be beat - it is an experience like no other. Meeting folks from all across the country or world and sharing a fancy tasty meal with them at 50mph is special in a way I can't fully describe. It is part of the romance of riding the rails. I'm well aware that the Amtrak version of rail travel is very different from what it was in the 1950's, but it is always a lot of fun! This entry is also unique in that it describes a model train that I do not own yet, in any degree. My Empire Builder will sport the Great Northern's Omaha Orange, Pullman Green and gold stripe color scheme, and will be hauled by a set of F3 diesel locomotives. Lionel, K-Line, Weaver, and MTH have all offered this train set at various times. It is very sharp looking, and my railroad's passengers will be thrilled to take it past the fields, lakes, mountains, and towns of the train layout of the future! Keep your rails shiny ~


The original Builder

Saint Paul station, from my first ride on the Empire Builder in November 2008

The train continues west after I disembarked in Malta, MT

A snowy day as my future wife and I catch the Empire Builder in Malta in November 2010

Amber gets back on the train after taking a stretch at the Saint Paul station

Me and the Builder
Newlyweds await the train in Malta in September 2011

We arrive in Columbus, WI

We are ready to step off

My bride and the Empire Builder's interior
An artist's rendering of the streamlined Great Northern Empire Builder

Thursday, January 9, 2014

DIY Shelving

A snowy day for interurbans - photo taken by Tim Vermande from rrpicturearchives.net
Happy winter to my blog readers ~

This week's Train Room guests included our friends Paul and Annie, who came over for supper last week. Over the weekend, I worked on several wood-related projects for the home, including some shelves for the Train Room. Several months ago, my bride helped me salvage several 1/2" thick boards which had been part of a large shipping crate. These were being thrown out, so we decided to adopt them. Now they are being given new life in the form of display shelves for the Train Room! I cut them to length, and over the past few evenings I've been treating them with some cherry wood stain the previous home owner left. So far the shelves have cost $0! I'll just need to pick up some mounting brackets/hardware. I went ahead and scanned for studs in the walls and marked them appropriately, so this little project should be finished up shortly. The shelves will be used to display not only model trains, but also a mighty miscellany of railroad-related artifacts I have collected thus far. Also over the weekend, I acquired a nasty cold thanks in part to various snow-clearing activities. I am still dealing with it, and my long-suffering wife is doing her best to help me rest and recover.

The ninth in this series of future passenger trains will discuss interurbans. The term "interurban" may refer to a piece of physical train equipment, or to the electric railway that runs said equipment. When I use the term, I am most likely referring to a type of passenger train that ferries passengers between cities or suburbs. Interurbans are usually capable of high speed travel, and may consist of one or more self-powered passenger train cars. You may think of an interurban as a cross between an electric streecar and a pleasantly upolstered heavyweight passenger car. I've had the pleasure of riding many preserved interurbans at the Illinois Railway Museum, and at several other points across the United States. The Electoliner, disucssed eariler, is a type of interurban, but warranted a discussion entry of its own. The other interurban currently in my roster is the K-Line produced Chicago South Shore & South Bend two-unit set. A picture of a real-life set is at the top of today's posting. This is a very fun train to run, with good sound effects and good dependability. As the name implies, this railroad connects South Bend, Indiana with downtown Chicago. A form of this electric line still runs today. I would gladly add more interubans to the collection if presented with the opportunity, but affordable O-Scale options are rather limited. While manufacturers like K-Line, Lionel, and MTH have produced samples of interubans, the more prevelent means of acquiring O-Scale models is to build them yourself. There are thousands of stunning 2-rail options available, and properly built kits are very valuable. While I've become comfortable building structures from scratch for the train layout, I don't feel a desire to build any sort of rolling stock from a kit. The Chicago area had dozens of different interurban lines, and this seems to be an untapped market in the realm of O-Scale trains. At present, there are two models on my "some day" list: the fancy 3rd Rail-produced CNSM Silverliners, and the more affordable CNSM set from K-Line, which is from the same family as the CSS&SB set I have. Maybe someday there will be more options available for the many O-Scalers across the country that want to add more interurbans to their fleets. There are not any local examples of interubans to model, as Billings was not served by any electric railroads. In the first part of the 20th century, the Billings Traction Company ran battery-powered trolleys to transport citizens, but we'll have to touch on that in a later discussion! Until next time - keep your rails shiny ~

Free boards cut

Free stain being applied

Thursday, January 2, 2014

New Year, Renewed Locomotion


Happy New Year to all ~
In the past week, I removed all of the left-over painter's tape from the painting project, and hung up some current and previous train calendars. We entertained the Mize's on Friday, and they got to see the two train setups in action. I placed a second (and final) tub's worth of train literature in an antique trunk for display, and put away my various Christmas train goodies.

Over the weekend, I used the ProtoSounds reset chip my wife got me for Christmas to perform some surgery on my MTH Chicago and Northwestern E4 Hudson. If a ProtoSounds 1.0 locomotive sits for too long without being run, the sound system may need to be reset. When powering up the engine, it will sound 3 "clanks", signifying that a reset is required. The engine will not run at all when a reset is required. Well, that has been the case for several years for the E4, and thanks to my wife, I've finally been able to do something about it! To start the process, I placed the engine on a powered track for 2 hours to charge the on-board battery. Then, I removed the cover on the tender. I placed the tender and its various components on an authentic Pullman towel to protect them (and prevent them from rolling away.) Using a special tool, I removed the ProtoSounds computer chip and replaced it with the reset chip. I put the cover-less tender back on the track, and re-tethered it to the locomotive, and applied power. It played the appropriate sound file, advising that the system was successfully reset. I then removed the reset chip and placed the ProtoSounds chip back. I then re-tethered the tender to the engine, and tested it - it successfully cycled from forward to neutral to reverse and back to neutral! I also discovered that the on-board battery required replacement, so I addressed that issue as well. After reassembling the tender, I found that the cable tie that holds the tether in place was outside of the tender rather than inside, so I had to disassemble the tender again, and placed the cable tie at the right spot. After putting it back together (the entire surgery was performed with my Swiss Army CyberTool 34), I hooked the locomotive up to the waiting freight (using the ProtoCoupler gimmick), and the unequaled flagship of my O-Scale fleet flew down the track once again . I reactivated the smoke unit (it had been turned off while charging the engine for 2 hours), and it performed well with a full head of steam! I noted that the "chuffing" sound of the locomotive was not working, so I performed a reset using option 18. That fixed the "chuffing" issue, and now it provides a more authentic sound. The whole procedure took about 35 minutes. Thank you again to my bride for helping to bring about the triumphant return of the mighty E4 Hudson.

On Monday night I gathered several tubs of office supplies into the Train Room and began sorting them. Amber helped finish up this quick project on New Years Day. Our office supplies are now easily accessible and sorted (and labeled), and the Train Room is now ready to be visited again!


The E4 Hudson was charged on the tracks for about 2 hours before surgery

The tender cover has been removed, exposing the internal electronics

Now the ProtoSounds chip has been removed. The reset chip was installed and run successfully, and then all of the components were reattached

The C&NW Hudson pulls a freight for the first time in years

I tested the engine's functionality and refreshed my understanding of its various sound tricks

Friday, December 27, 2013

Christmas Time!


I hope everyone had a most-merry Christmas! I received many generous gifts from loved ones, and many of them are train-related. In the past week, I completed the Christmas Train in the Train Room, hung up more railroad art and memorabilia, transferred a lot of train literature from a plastic tub to an antique display-trunk, and cleared more space in the hallway and laundry room. On Christmas morning, the Gamsbys and Seemans visited the Train Room (and the rest of the house too.)

My bride gave me a Lionel 6257 postwar caboose, an MTH Proto-Sounds reset kit, a stack of O-Scale railroad ties, an O-Scale Nativity display, and a photograph of the first C&NW steam locomotive: the Pioneer.

My folks gave me the 2013 Lionel Hallmark ornament set, and the 2014 Howard Fogg Trains calendar.

My sister gave me the 2014 Lionel Trains price guide.

And, my folks-in-law gave me an antique wooden railroad whistle, a steam train DVD set, the "Wyoming Whistle Stop" booklet, "Mailing May" - an early Idaho railroad story, a framed picture of an old toy train, and a Montana Rail Link cooler.

We gave our nephew, Edgar, a red steam locomotive ornament, a train outfit (makes him look like an engineer in overalls), and a big, warm train quilt (see picture above).

The train I set up around the living room tree this year consists of an all-Lionel cast. Aside from the engine, I alternated the train with red and green cars. At the head is C&NW 4-6-2 Pacific #2903, the first Lionel steam locomotive I purchased. Following it is a red Canadian National reefer, a green C&NW covered hopper, a red Union Starch tank car, a green Railway Express Agency reefer, and a red C&NW bay-window caboose.

I've been greatly blessed by family and friends (not just in train-related endeavors), and I wish everyone a joyous and meaningful New Year!

C&NW 2903 leads a merry train under the tree

The red & green upstairs Christmas Tree Train

The Gamsbys, Poynters, and Seemans visit the revamped Train Room

Lots of fun and useful train gifts for Mark! Thank you everybody!

Thursday, December 19, 2013

Christmas Train


Merry Christmas blog readers!

The past week involved some more merry-ish projects than in previous weeks. I finished up the pile of filing that had built up, and then found and hung additional railroad art and artifacts. I brought all of my trains into the train room, and after some puzzle-work, placed them into the two closets. I cleared a bit more in the hallway, laundry room, and garage, which will allow people to actually get into the train room. I also set up the TV for watching lots of railroad-themed programs, and added a lantern-like lamp. Throughout the week, I set up and trimmed the Christmas tree, and added our antique portable fireplace to the temporary decor. I cleaned up the room, after the tree spread its little fake needles all about, and used the space to wrap several Christmas gifts for my bride. Friends Ted & Michelle came over to visit and got to see the nearly-complete room. And last night, I setup an oval track and transformer, and ran the new C&NW GP7 around the tree. Thus, the first train has been operated in the Train Room, as of Wednesday, December 18th, 2013... 3 days within my goal of "Fall 2013". Yes, an oval around the Christmas tree counts as a "functional O-Gauge model railroad" :)

The #1518 C&NW GP7 is a new addition to the fleet this year. This Lionel locomotive is modeled after the very first GP7 ever produced, and I've actually been able to see it at the Illinois Railway Museum. It is appropriate therefore, that it was the first engine to run in the new Train Room. In Illinois, I have another model C&NW GP7 (#8375) waiting in the queue to be shipped to Montana; once it is here I can double-head them.

I also set up a Christmas train under our Living Room tree - I will report on that next week! And, as usual, the Season brings other fun decorating projects - at the top of the page is our deck Christmas display for 2013. Amber added all of the spiffy accents, and I laid down the lighting.

A new arrival joined the collection this week too - a K-Line die cast hopper car in the Santa Fe "Midnight Chief" (aka "Black Bonnet") paint scheme.

The train boxes are nestled all snug in the closets

Newest addition - a die cast scale ATSF Midnight Chief hopper car

Christmas decor!

The new #1518 C&NW GP7 model


The original #1518 C&NW GP7 prototype

Thursday, December 12, 2013

Great Progress

On Saturday morning, I finished scraping the floor. This allowed the rest of the project to proceed quickly. I cleared everything out of the room, and using a shop vac borrowed from a friend at work, removed all of the scraping debris. Using a mixture of TSP and water, I treated the floor, and then dried it using a mop and the shop vac. Next I applied the concrete etching liquid to the borders of the room. This has special time limits and procedures to follow. It has to stay moist while it is "cooking" the floor, and must remain on the concrete for at least 30 minutes. Etching prepares the concrete for painting, so the paint will adhere properly. It must be completely removed from the floor before painting, so I rinsed it with the mop and sucked up the remaining liquid with the shop vac. Once it dried, I repeated the process on the remaining "middle" part of the floor. Then I had supper with Amber and her folks. I finished up Saturday night by painting the brown trim border around the bottom of the walls. I activated the moisture-detector test, which is just a piece of plastic duct-taped to the floor.
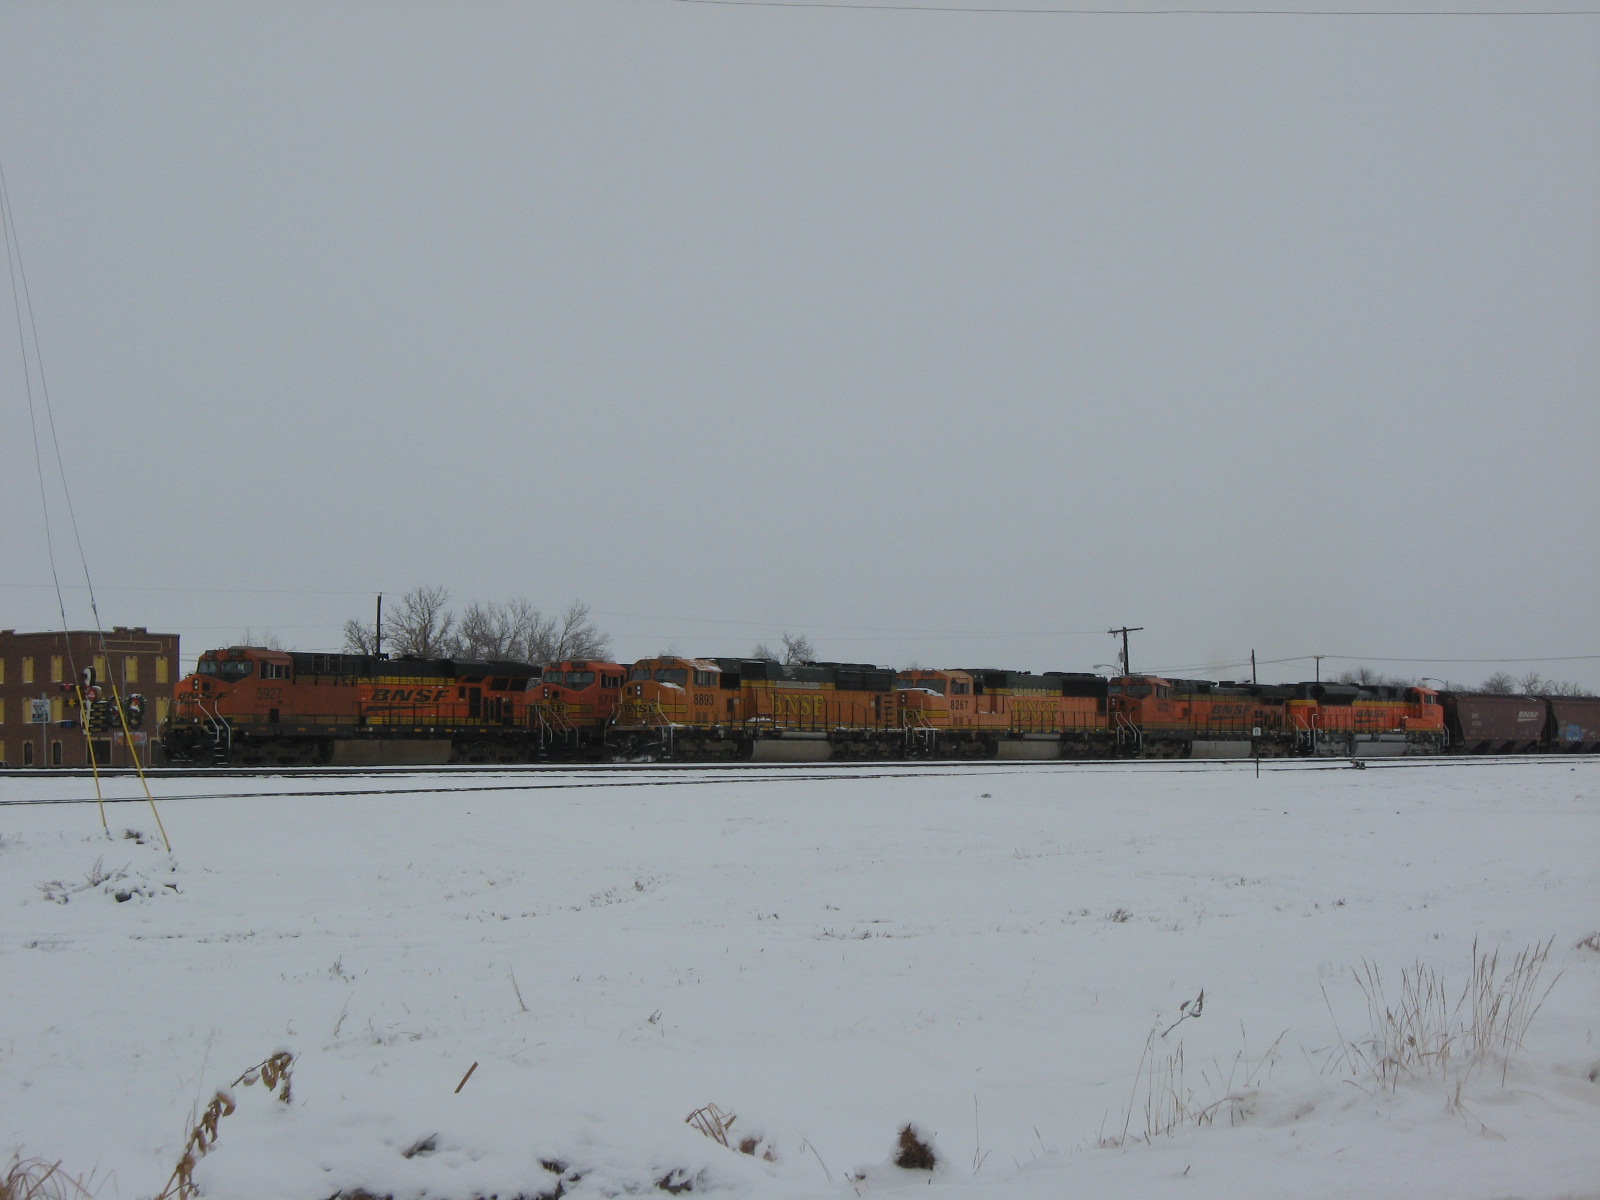
On Sunday morning, I checked the moisture-detector, and found it to be dry on the top and undersides. While in Laurel, MT, I took a picture of several BNSF locomotives waiting for orders to pull their trains WB (photo at top of this entry). After church, I checked for moisture once more to be sure, and then started the first coat of floor paint. I did some border work with the brush, and used the roller for the rest. After 4 hours, I applied the second coat, this time brushing the entire border, at Amber's suggestion. The results were very good!
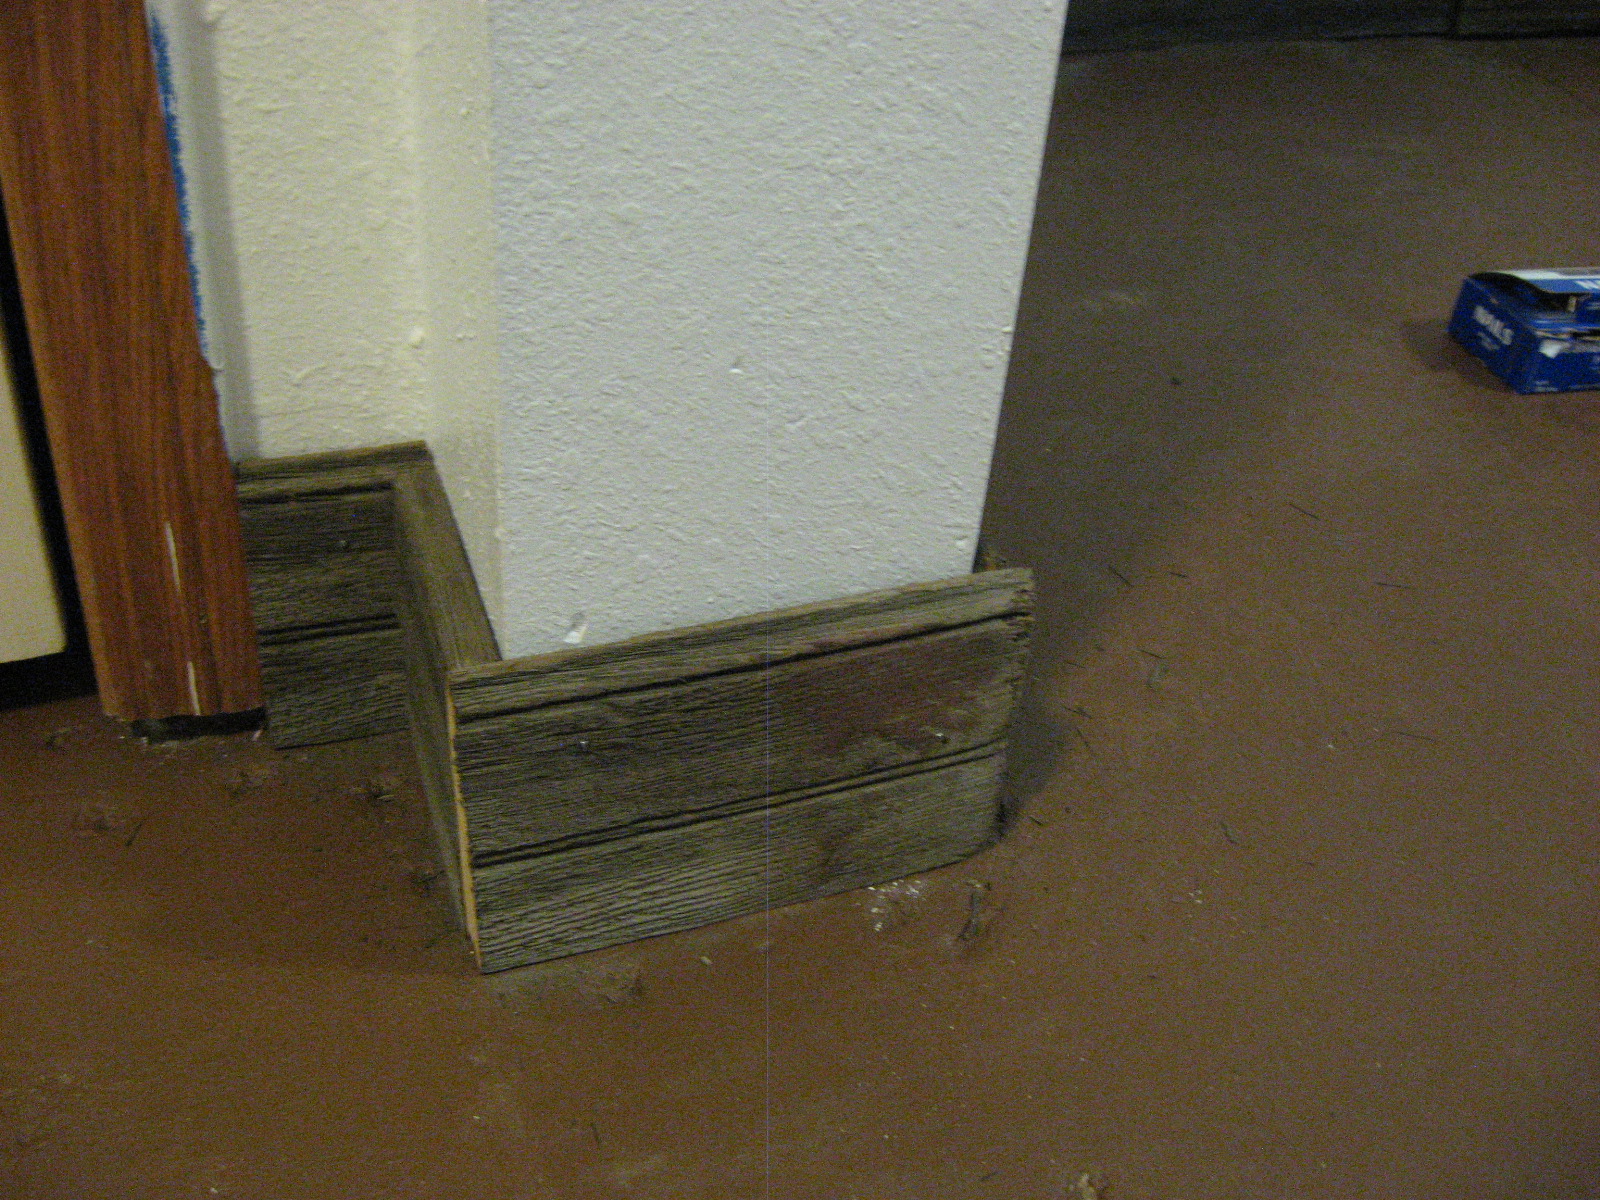
On Monday night, I brought in six planks of boxcar wood from our shed. A few years ago, our friend Jeff from church gave me one of his boxcar sheds. I took it apart (with help from my friends Darren, Kevin (Keg), Bill, and Andrew) one board at a time, and now most of it is sitting in our shed. It was originally Northern Pacific boxcar #31628, built in 1918. I cut the 6 planks into trim pieces for the Train Room, and nailed them to the wall. I placed pieces which still have some of the original boxcar paint on them in spots that are easy to view. Since this wood is nearly 100 years old, and spent most of its time outside, either as part of a tree, or part of a boxcar hauling grain throughout the country, or as part of an animal shed, some of it has rather large holes or cracks. This is why I painted the brown border around the bottom of the floor, so there wouldn't be white paint showing through these eccentricities.
On Tuesday, I cleaned and vacuumed the room again, and moved in the larger furniture pieces which sit along the eastern wall.
On Wednesday, I moved in the pictures that will be stored, and started sorting the papers we have accumulated since moving into the house in April. That project should be wrapped up tonight. I also started hanging up some railroad artwork and artifacts on the wall.

The floor has now been scraped, scrubbed, and etched. The brown border has been painted as well.

The finished floor!

Now the boxcar wood trim has been added. The upper right section of this board has some of the original red boxcar paint on it.

The room is now complete! Thank you to everyone who helped and tolerated this project (especially my bride) to this point. Looks like new walls and floor!

And this is what it looked like about 4 months ago...

Thursday, December 5, 2013

Tree Incentive


We've made it to December - that means I just have a few weeks to meet my Fall goal. Outside looks and feels quite Winter-y already, with 9" of snow and high temperatures below zero. I've been blessed with a new incentive to get the Train Room floor done though... and it is a Christmas tree. Right now, the items that are headed back to the Train Room are blocking the path to part of one of our Christmas trees. And, in my wedded bliss, I can strongly sense that my loving wife would strongly like to decorate a Christmas tree as soon as possible. So, scraping efforts have been doubled. 25% of the entryway/closet area has been scraped, and I've arranged to borrow another shop vac from a coworker, as the one I've been using is somewhat hindering the process at the moment. I believe this weekend will produce much progress.

The eighth in the series of future passenger train discussions is "The Canadian". This is a streamlined 7-car version of the real-life Canadian Pacific "Canadian" which entered service in 1955, and a form of it still operates today. The Canadian connected Vancouver, BC to Sandbury, ON, and then on to either Montreal, QC or Toronto, ON for a 71-hour trip. On our honeymoon, my wife and I were able to ride on The Skeena passenger train (a.k.a. "Jasper - Prince Rupert"), a small sight-seeing consist that runs on some of the same tracks as the current Canadian. We traveled from the bustling metropolis of Dunster, BC (I'm sure you've heard of it) to Jasper, AB. Dunster has a population of about 27, but they use the metric system, so I'm not sure how that converts. Anyway... it was a very fun and pretty 60-mile ride. We had practically an entire passenger car to ourselves. At the end of the train was the Waterton Park vista dome observation car (Canadian Pacific #15417). I was allowed to tour it briefly before the train left Jasper. Jasper was not on the original route of The Canadian; instead, it was served by Grand Trunk Pacific and Canadian National passenger trains. My Canadian is an O-scale MTH set, pulled by Williams F3 ABA locomotives. Lionel originally made a semi-scale version of this set in 1957; the locomotives from that original set are some of the most sought-after Lionel collectibles of the postwar era. Mine have little collector's value, but they make for a very sleek trainset, and will be pulling The Canadian around the train layout of the future for years to come. The observation car on my set is based on the Sibley Park (original Canadian Pacific #15413). The CP's color scheme of grey and maroon, with yellow accents, and their nifty beaver logo is rather ritzy, and graces the top of the blog today while running on the SPCR&GC RR. Keep your rails shiny ~

Section scraped in front of closet door

25% of this section done

The Canadian in the Canadian Rockies

Newlyweds and the Waterton Park in Jasper, AB